Of all the questions I get from people about my blog, the most asked is – do you make money from it? The answer is always the same – No! Then comes the lengthy discussion of why not: because it’s hard to make money on blogs. You first must have a huge readership to get advertisers willing to pay you more than $25 a year for the privilege of turning your site into a cluttered billboard. And then there is this reason: I started this blog as a labor of my love for interior design with absolutely no expectations of making any money. That hasn’t changed these past two years. Why would I want to turn my labor of love into a advertising free-for-all for Google ads or Amazon books or the latest green cleaning agent? And still – I don’t want to have to keep up a posting schedule that an advertiser might impose on me either. Nope. I’m ad-free now and hopefully forever, thank you very much!
There is this other oft asked question: does your blog help your interior design business? Do you get clients from it? Oh boy, yessiree I get clients! I have many, many readers who send me pictures of their house with questions on furniture arrangements or curtains or questions about seagrass (a lot of those) and slipcovers (even more!) or how about this one: how can I get my musty antiques to quit stinking up my house? Yes, I get clients. The problem with these kinds of clients though, is they aren’t paying ones. Usually their request for help can be answered in one or two emails, which is no real bother. In fact, I actually like those emails – it’s fun to look at readers’ houses and give my advice, though why they would want it is beyond me. As the blog has grown, so have the email requests and sometimes it does take a toll on my time. Have I ever gotten a true client from my blog – a paying client that actually lives in H0uston proper? While I’ve gotten a fair share of inquiries for true design work - most never go further than the initial email. They either live too far away from me as Houston is a very large, spread-out city. Or, they get a severe case of sticker shock when we start to discuss budgets. But, I have had a few clients that came to me from the blog, where everything worked out and the job was actually started and completed. This is a story about one such reader, who sent me an email asking for design help. As usual it came accompanied with pictures. And as we talked, she revealed that she was the reader who once left me a Kenneth Turner candle on my porch after I had blogged about them. Could any designer want for a sweeter client?
It started slowly. She and her husband and sons live in Tanglewood – one of Houston’s finer neighborhoods. Her house is an older two story, about which they were debating whether to tear it down and rebuild, or remodel, or just move. Their final decision was this: they would do a small remodeling job, wait until the boys went off to college in a few years, and then they would tear it down and rebuild. Maybe. The main issue was the problem of their master bathroom. They wanted to gut it and turn it into a smaller, but more efficient bathroom and add a separate powder room. Could I help her pick out marble and tiles? Hmm. I guess. Truthfully, picking out tile didn’t sound too promising or really worth my time. It sounded like another wild goose chase where the potential blog client is at first all excited, then gets cold feet, never to be heard from again. But this one was a little different and she actually had architectural plans for the bathrooms, and hey, I wasn’t too busy.
We worked on the two bathrooms and had the numerous and typical set backs and issues with contractors and stone tiles that turned mysteriously pink when installed. Try picking a paint color for that!! While work was being done on the bathroom gut jobs, my client confessed that she had recently purchased a sofa for her family room. Could I help her with fabric choices? Why, yes, as a matter of fact, I can. The two bathrooms are finished now. The master bedroom is still being worked on. Today, we finished the family room. So you see, in the end, it was worth my time. I gained a friend, and a client who turned out to be exceedingly nice and polite and very fun to work with. You know – that perfect combination. And I am learning something important. The BEST part about getting clients from my blog is that they already know my style. They’ve seen my work and obviously like my taste or they wouldn’t be hiring me. Without me even realizing it, much less planning it, my blog has become a portfolio for potential customers to peruse. After years and years of working with people whose style is so vastly different than mine, it’s refreshing and extremely exciting to work with a client who knows my look and wants it for herself! Here’s the story of her family room redo:
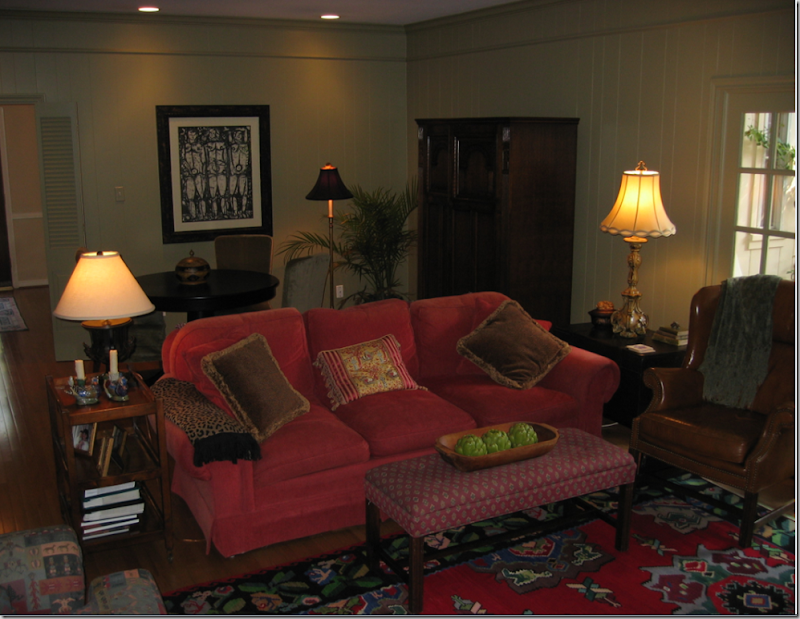
BEFORE: She had decorated it with some help a long while ago. The room was nice enough - cozy, and warm, just outdated for the 21st century. The walls were green, though it doesn’t look like it here. There were two groups of matching chairs, a dated brick fireplace and mantel, 60s type paneling and layers of nick naks built up from years of married life. And, there were no window treatments at all. What she wanted: the same cozy, warm room, just updated. The client actually had architectural plans for a major remodeling of this area of the house, but in the end they opted for redecorating instead.
BEFORE: The room is long and narrow with French doors on each side.
BEFORE: At the back of the room there is a table and chairs. With two teenaged boys, internet surfing is allowed downstairs only – in plain view of their parents. This became the main issue of the redo. The boys’ computers and gaming equipment (cleaned up for this picture) had overtaken the room. Clearly, something had to be done to provide them with a place to work, yet it needed to be somewhat hidden. A computer armoire? There are two boys, two computers, but two armoires in one room? Not a viable solution.
BEFORE: It was decided that a cabinet would be built in the back of the room along these two walls. There would be two computer stations hidden behind doors. With a plan in hand, fabrics were chosen, paneling was painted, the dated mantel was removed, doors were replaced, and everything was purchased new in the room, save for a coffee table and a gate leg table.
AFTER: In the entry hall, we painted the walls a cool toned, greenish taupe. The stair handrail was painted black to pop it. Two black lanterns were hung – one by the door and one in the stairwell. I found her an antique gate leg table and a new lamp was ordered from Aidan Grey. Seagrass will probably be going on the stair treads – if the bid will ever come in!
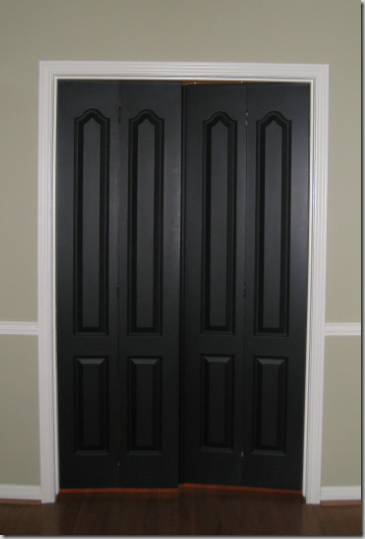
The dated shutters were replaced with bi-fold paneled doors. In fact all the doors in the house were replaced and then painted black. I like to do this when a house needs some extra architectural detail. Plus, I think the black paint gives the hollow core doors of today some much needed richness. The client was instructed to stay away all day and finally at 4:00 she was allowed home for the big reveal.
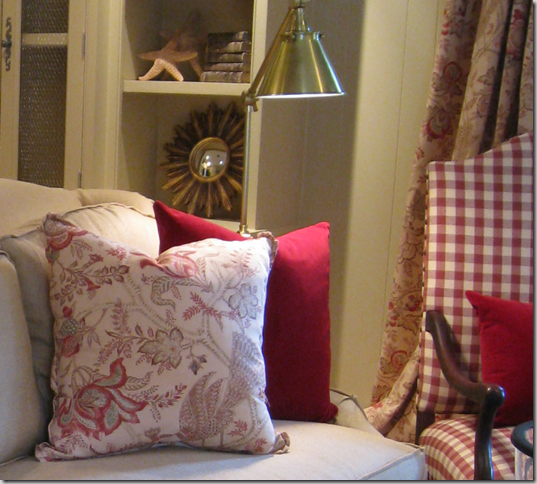
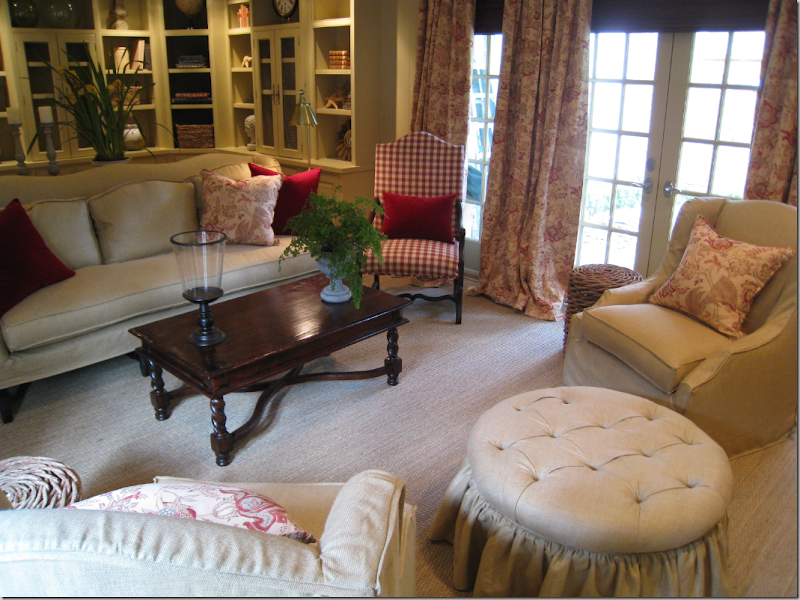
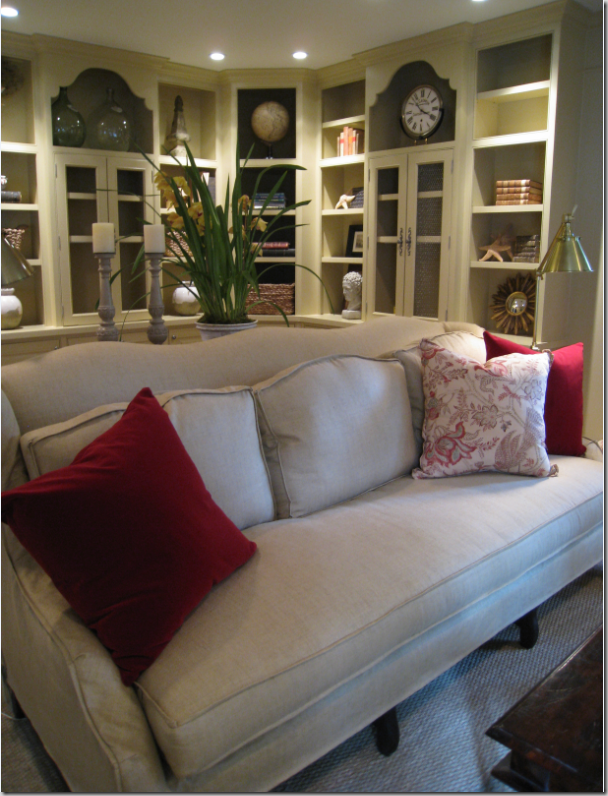
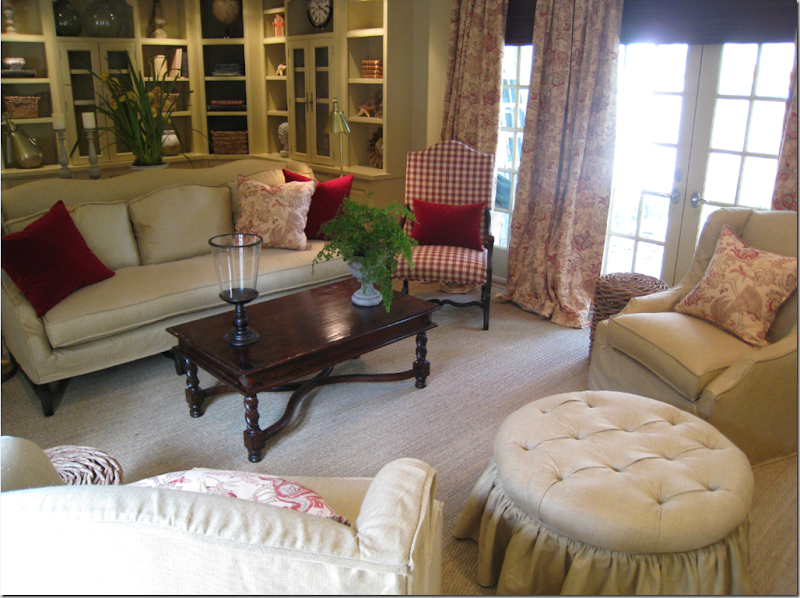
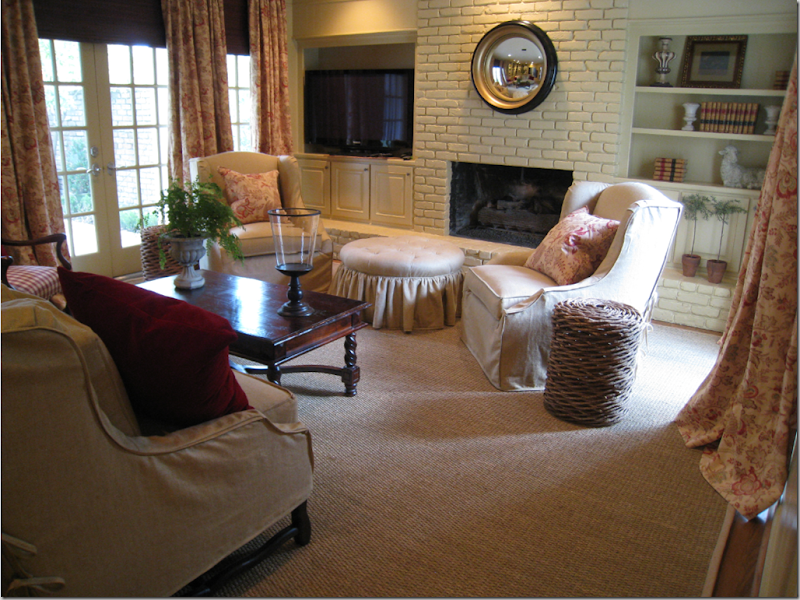
AFTER: The family room is now painted a rattan color, slightly yellow, slightly green, slightly creamy. The floor is covered with custom cut seagrass which extends to 5 inches away from the walls. There is an Os-de Mouton French sofa, slipcovered in a rattan colored linen, held in placed with long ties. There are two French styled wing chairs on swivels for easy TV watching along with a tufted top ottoman. For extra seating there is a French styled chair, in a Chelsea Editions check. The pillows are velvet and the curtains are a F. Schumacher print, which my client chose as the inspiration fabric. You can see the L-shaped built-in with the two hidden computer desks behind the sofa.
Another view. Since space and cluttering were concerns, we opted for two floor lamps next to the sofa instead of side tables. The coffee table will be used for drinks.
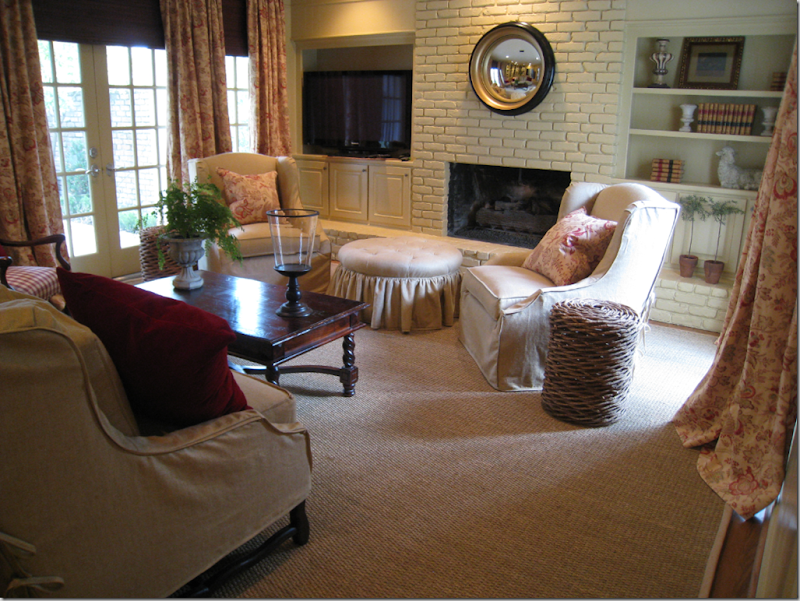
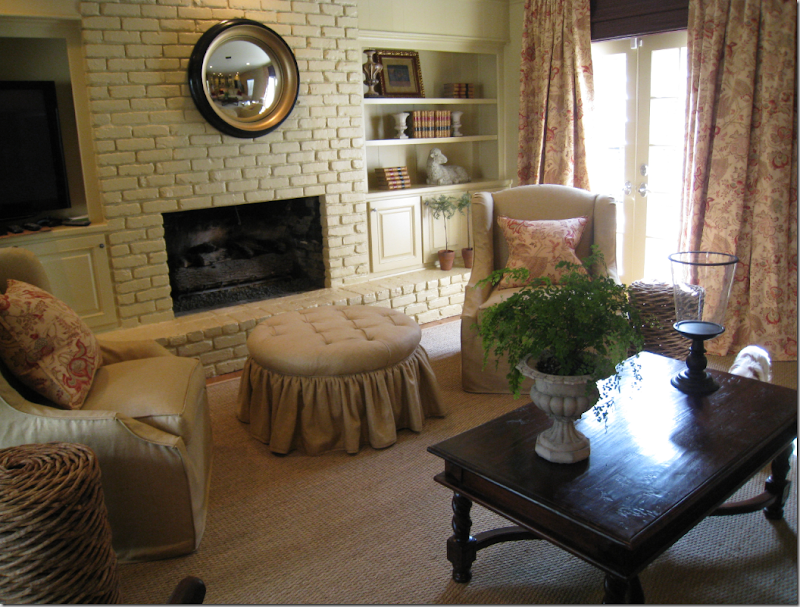
Looking towards the fireplace, we removed the mantel and placed a convex mirror there. Next to each chair is a vine table for drinks which was bought at the new Mecox store in Houston. In the existing bookcases, we added thickness to the shelves to update their appearance. In this picture, on the right, you can get a clear view of just how close the seagrass rug is cut to the wall, perfection!
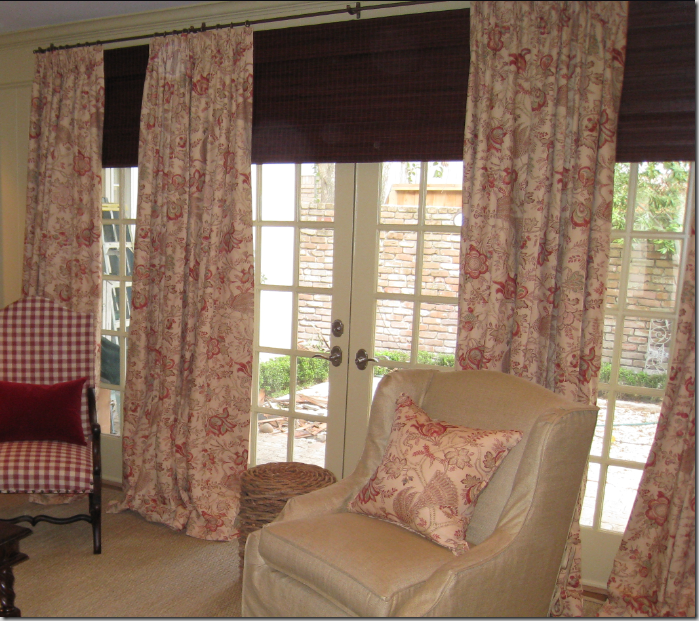
Close up of the curtain treatment. This is actually one French door with two side windows. In order to hide the wall space between the doors and the windows, I used four panels instead of the usual two. Each panel is two widths of fabric for extra fullness. If space allows, three widths is even better! To fool the eye that the ceiling is higher, I placed the curtains right under the crown molding and the deep brown shades were brought up to that height also – thus eliminating the visible wall space between the French doors and the ceiling. The F. Schumacher fabric is a linen that resembles a Bennison but without the price! At a quarter of the cost, my client was able to get the look of a fine fabric and not break the bank. At our initial design meeting, my client was presented an edited array of fabrics and this was her first choice. The entire color scheme was built around it. The rattan linen fabric on the upholstery is a Dogwood, also very cost friendly. The linen is actually a blend, therefore the slips will be laundered when necessary, not washed. And last, outside the window is a courtyard in the middle of being landscaped.
Close up of the sofa. The seams are a 1/4” flange. The back cushions are cut in the same shape as the back of the sofa.
And looking towards the right side of the room.
Behind the sofa, we placed the client’s large gate-leg barley twist table along with the two desk chairs for the boys to use at the computer desk. Instead of typical bulky office chairs which would totally ruin the look, we chose these tufted red leather ones.
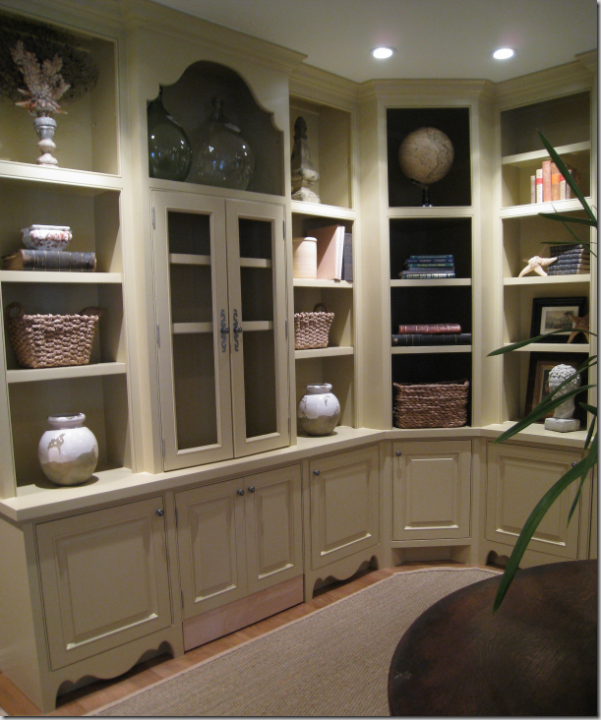
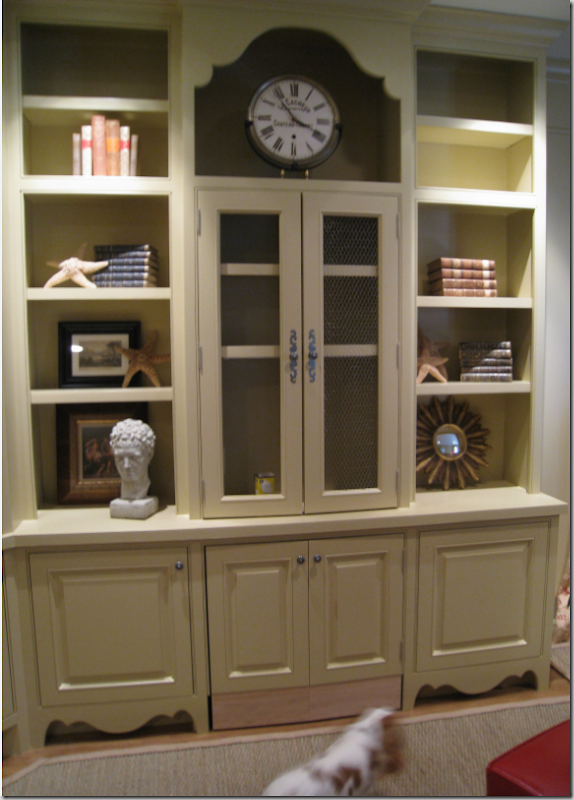
The bookcases are actually not completed yet. The center unit behind the doors houses the computer desks, complete with keyboard trays. These doors are getting chicken wire and will then be lined with fabric which will hide the computers when the doors are closed. The carpenter also has to finish the trim work below the center cabinet. Notice how the seagrass has been cut around the curves of the shelving unit. This is such an important aspect of getting your seagrass custom cut – these details around curves and fireplace hearths add so much!
The second side of the built in. Hi Mimi!!! You can see the chicken wire was attached on the right door. The boys are so anxious for their desks to be finished already. Some of the shelves’ accessories we ordered hasn’t arrived yet, and some of the books are still packed away.
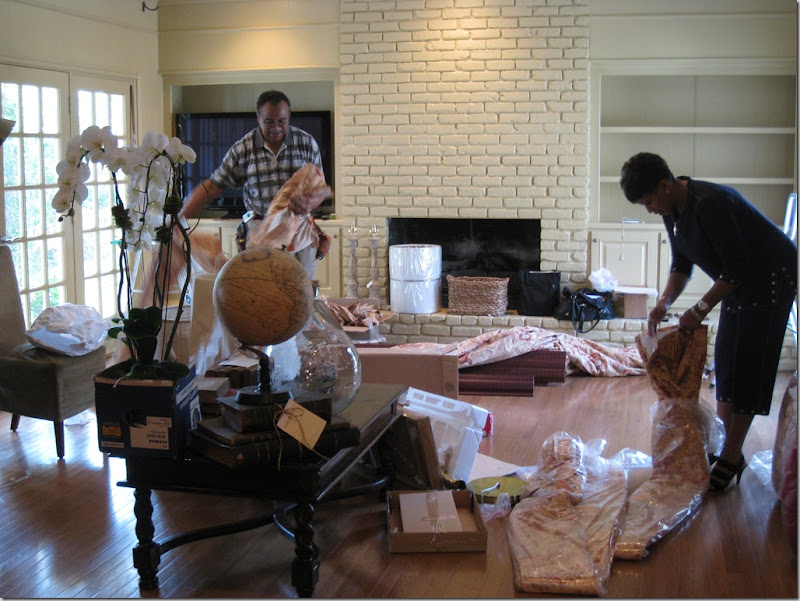
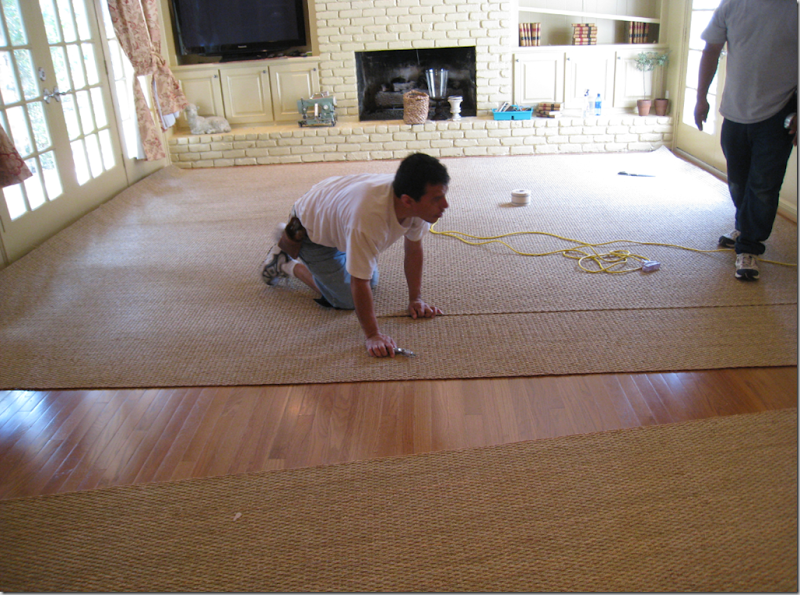
Behind the scenes:
My main girl! Monica Hancock of Custom Creations by Monica. Monica and I have been partners since my very first job! She does all my measuring and is the liaison between the workroom and my clients. Every drapery panel, pillow, duvet, and skirted table goes through Monica. I’m not sure I could be in business without her. She refused to pose for the camera because she hadn’t checked her hair or makeup first. Come on Monica, smile, you look great!!!!!!!!
Drapery installer extraordinaire: Mr. Bennie Davis. Back on the job after open heart surgery last year, Bennie is an artist, though he said he hasn’t started up again painting since the surgery. Bennie has installed every single curtain I’ve had made, except for the jobs when he was recuperating. Always smiling, always in a good mood, and always humming!!!!!!!!!!!! He agreed to pose without looking in the mirror first, what a team player.
Custom cut seagrass. Yes, it CAN be seamed – and I dare you to find the seam later. The seagrass was cut and the binding was glued, all on the job, causing the day to be extra, extra long. OY.
And finally: BEFORE
and AFTER.
BEFORE.
And AFTER.
The master bedroom should be completed in a few weeks. I’ll take pictures of it, along with the two new bathrooms!






No comments:
Post a Comment